How do I create a calculator?
Creating a calculator in Numio allows you to build interactive, customizable tools your users can engage with on your website. Whether you're creating a financial estimator, ROI tool, or cost-savings calculator, the setup process is simple. Follow the steps below to build your first calculator.
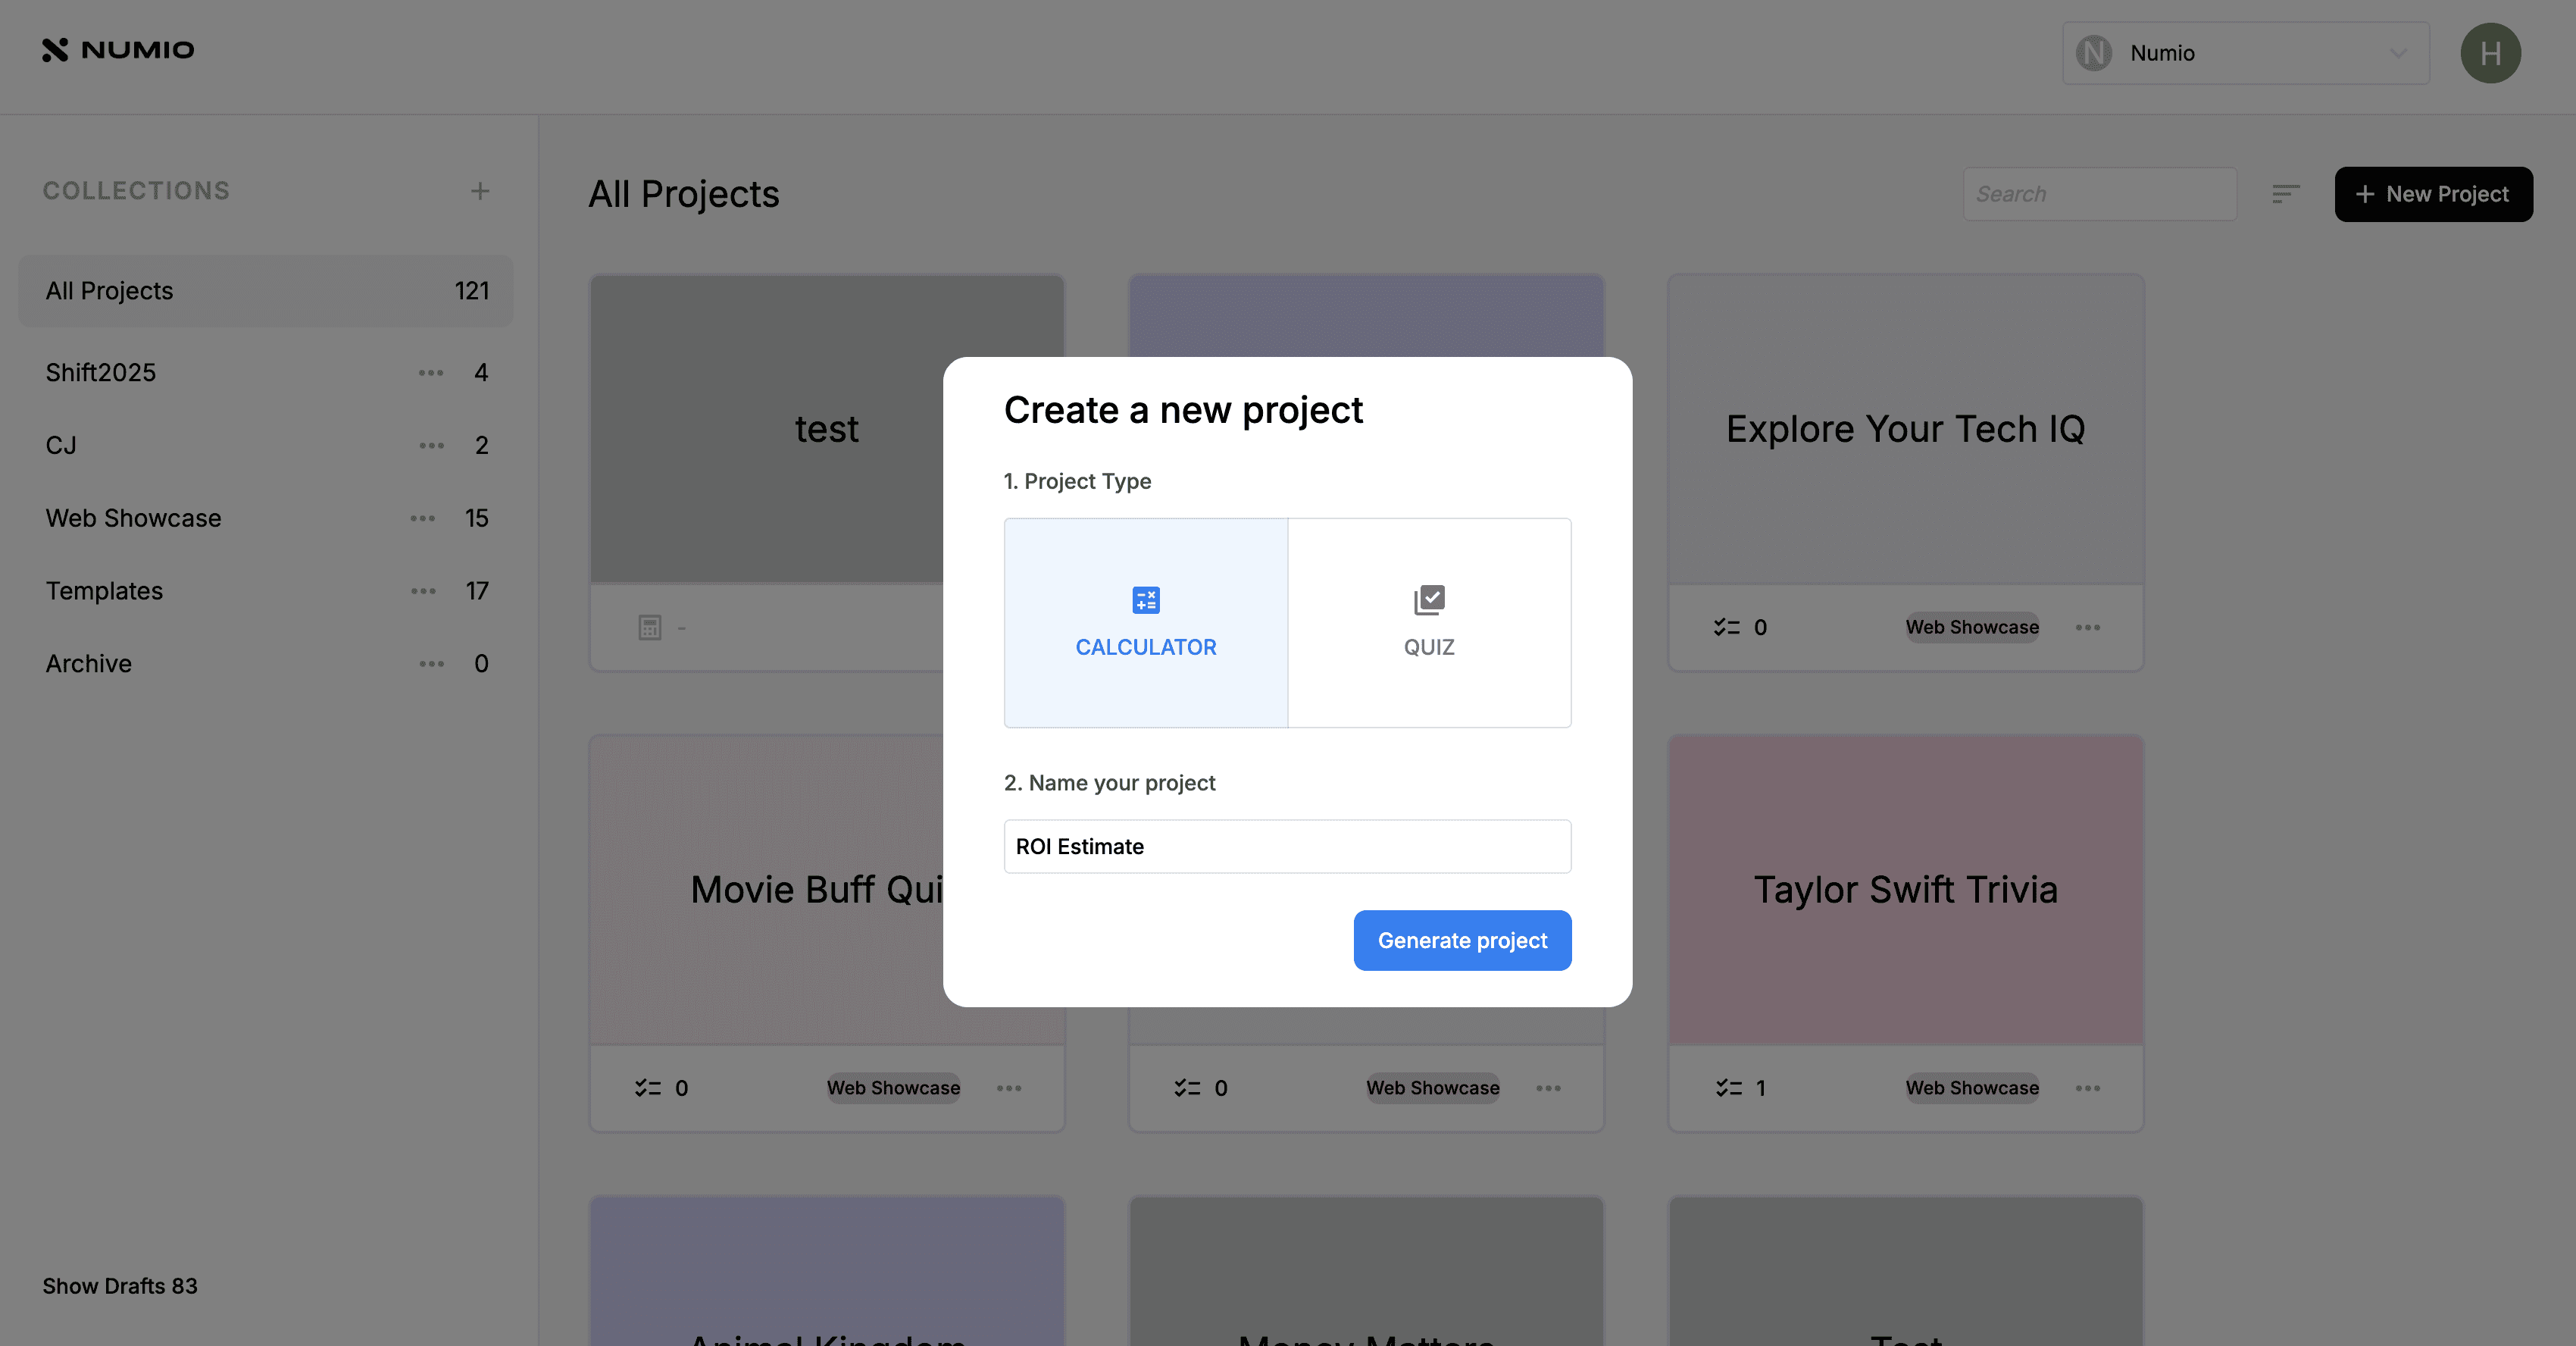
1. Access the Calculators Dashboard
From your Numio dashboard, click New Project.
Select Calculator, then give your project a name — for example, “Loan Estimate Calculator” or “ROI Estimator.”
2. Start Your Calculator
Click the Generate Project button.
This opens a blank calculator workspace where you can begin adding inputs, outputs, and formulas.
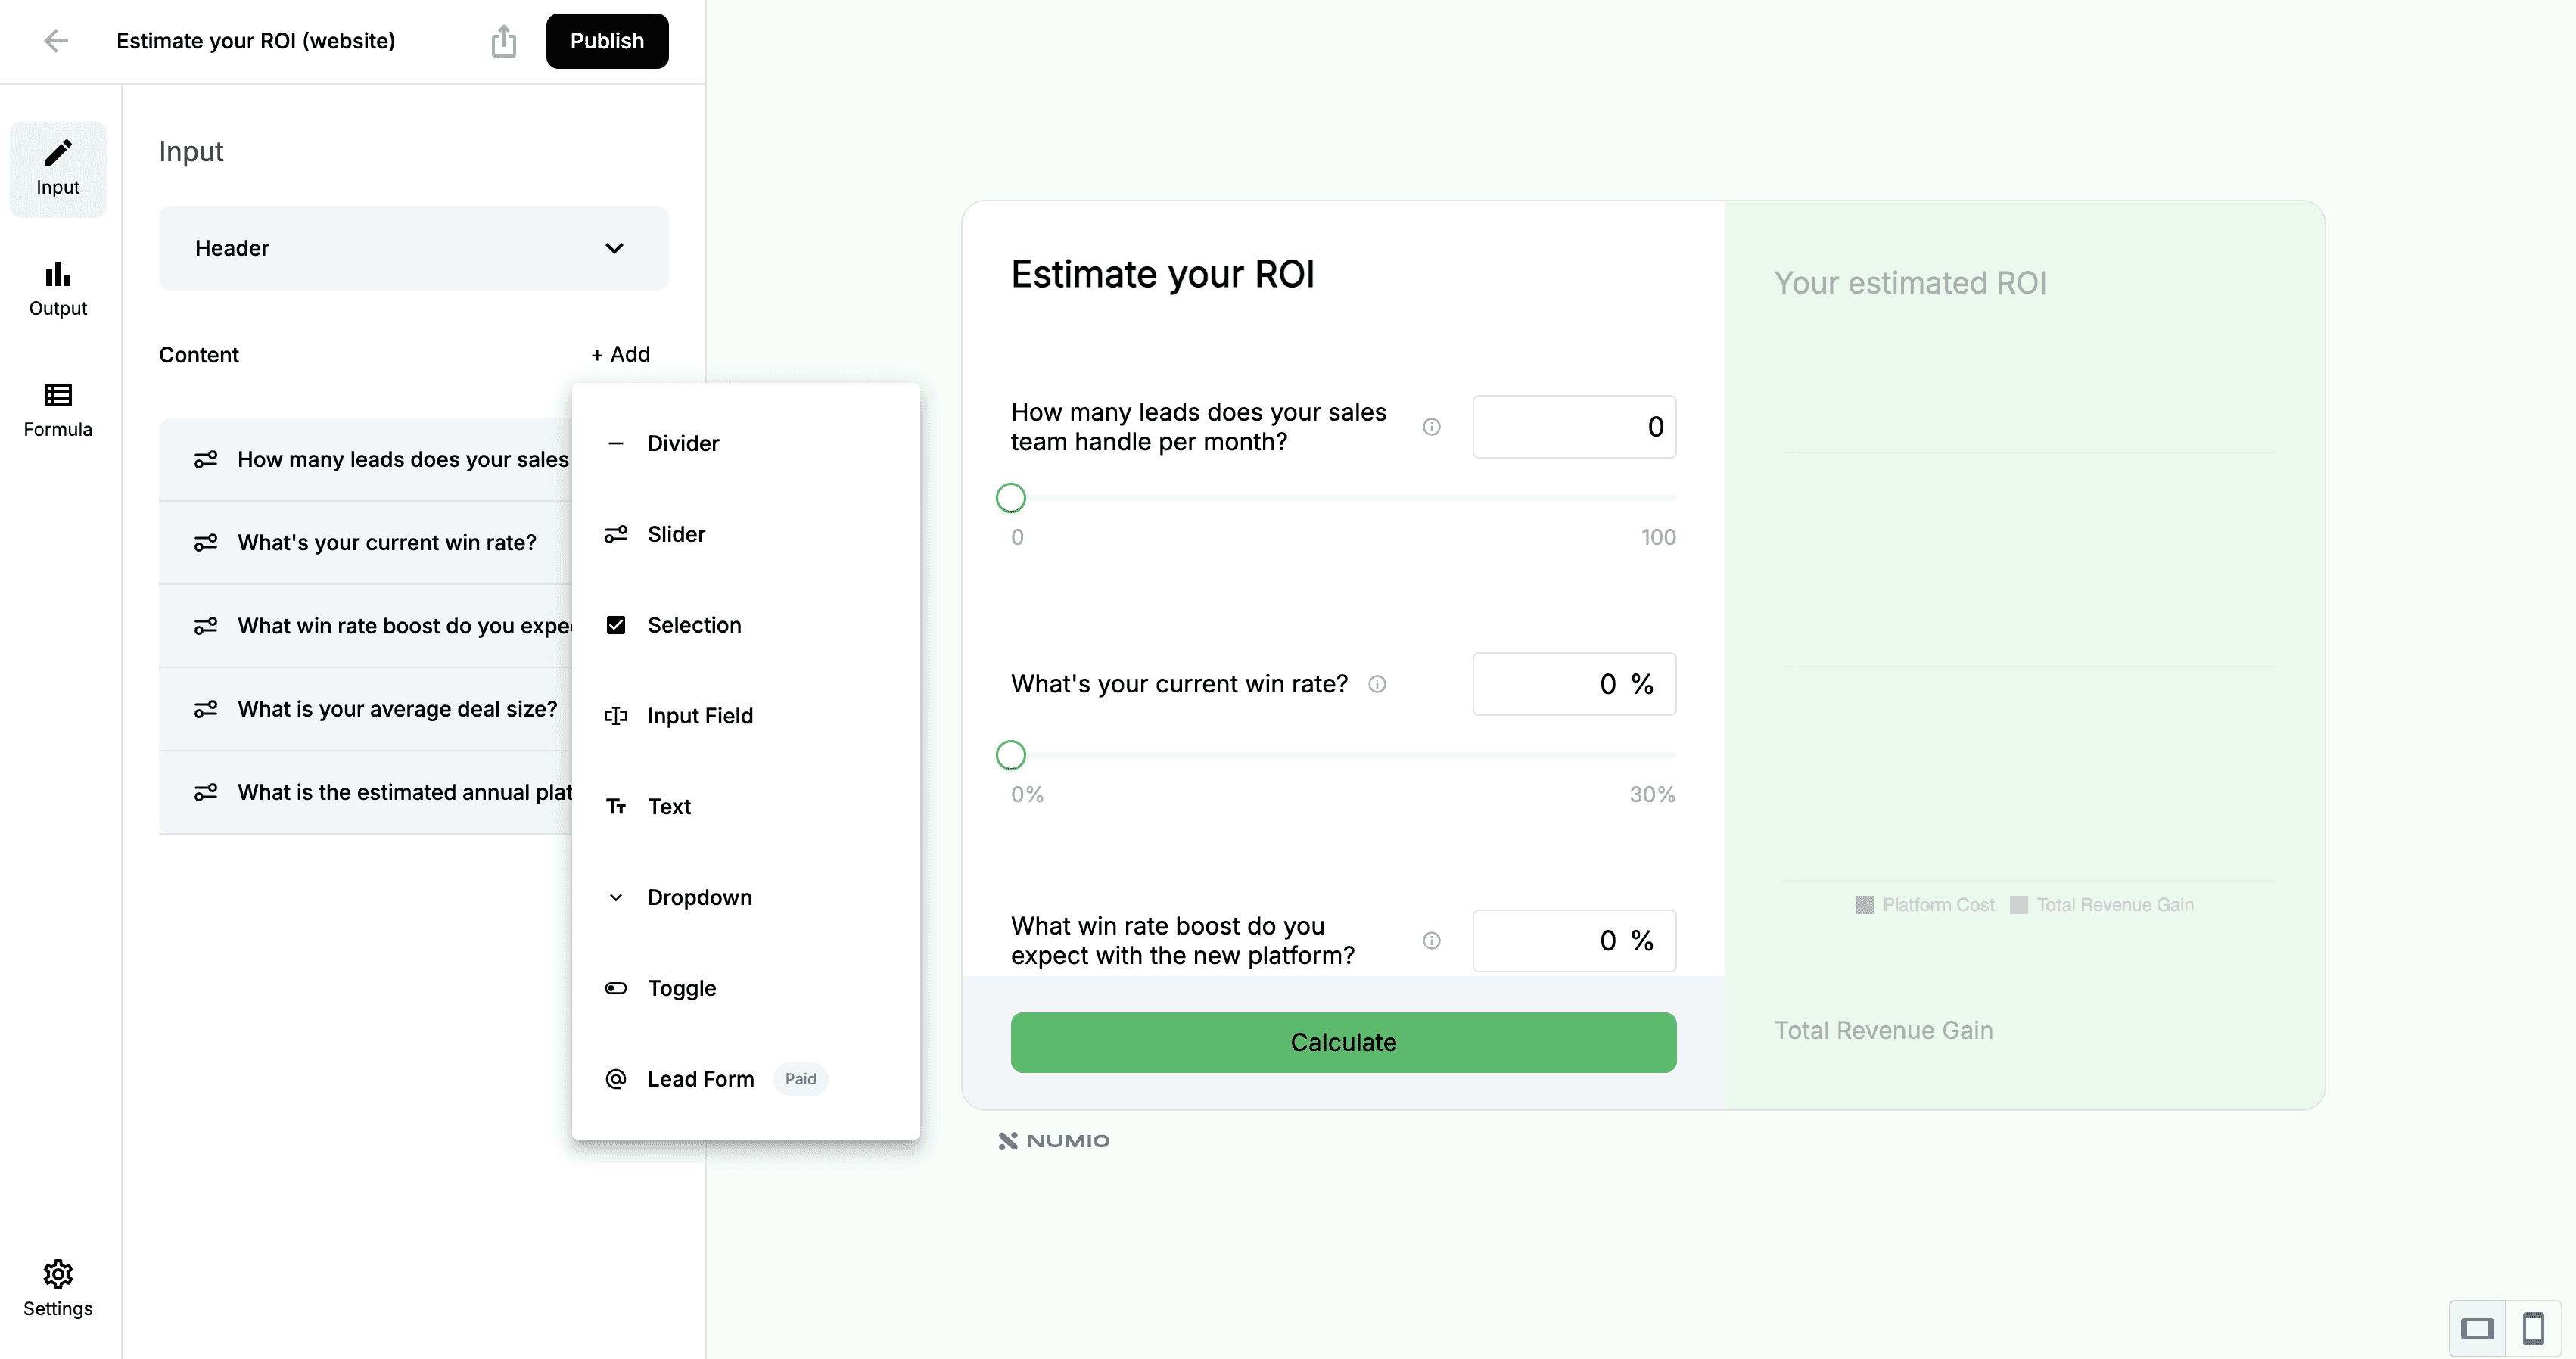
3. Add Your Input Fields
Inputs are the questions your users will answer. Each input becomes a variable you can reference in formulas.
Click + to open the input type menu. You can choose from:
Slider
Selection
Input (number/text)
Text
Dropdown
Toggle
Lead Form
Divider
Configure each input in the left-hand panel.
Here you can update labels, placeholders, ranges, default values, and more.
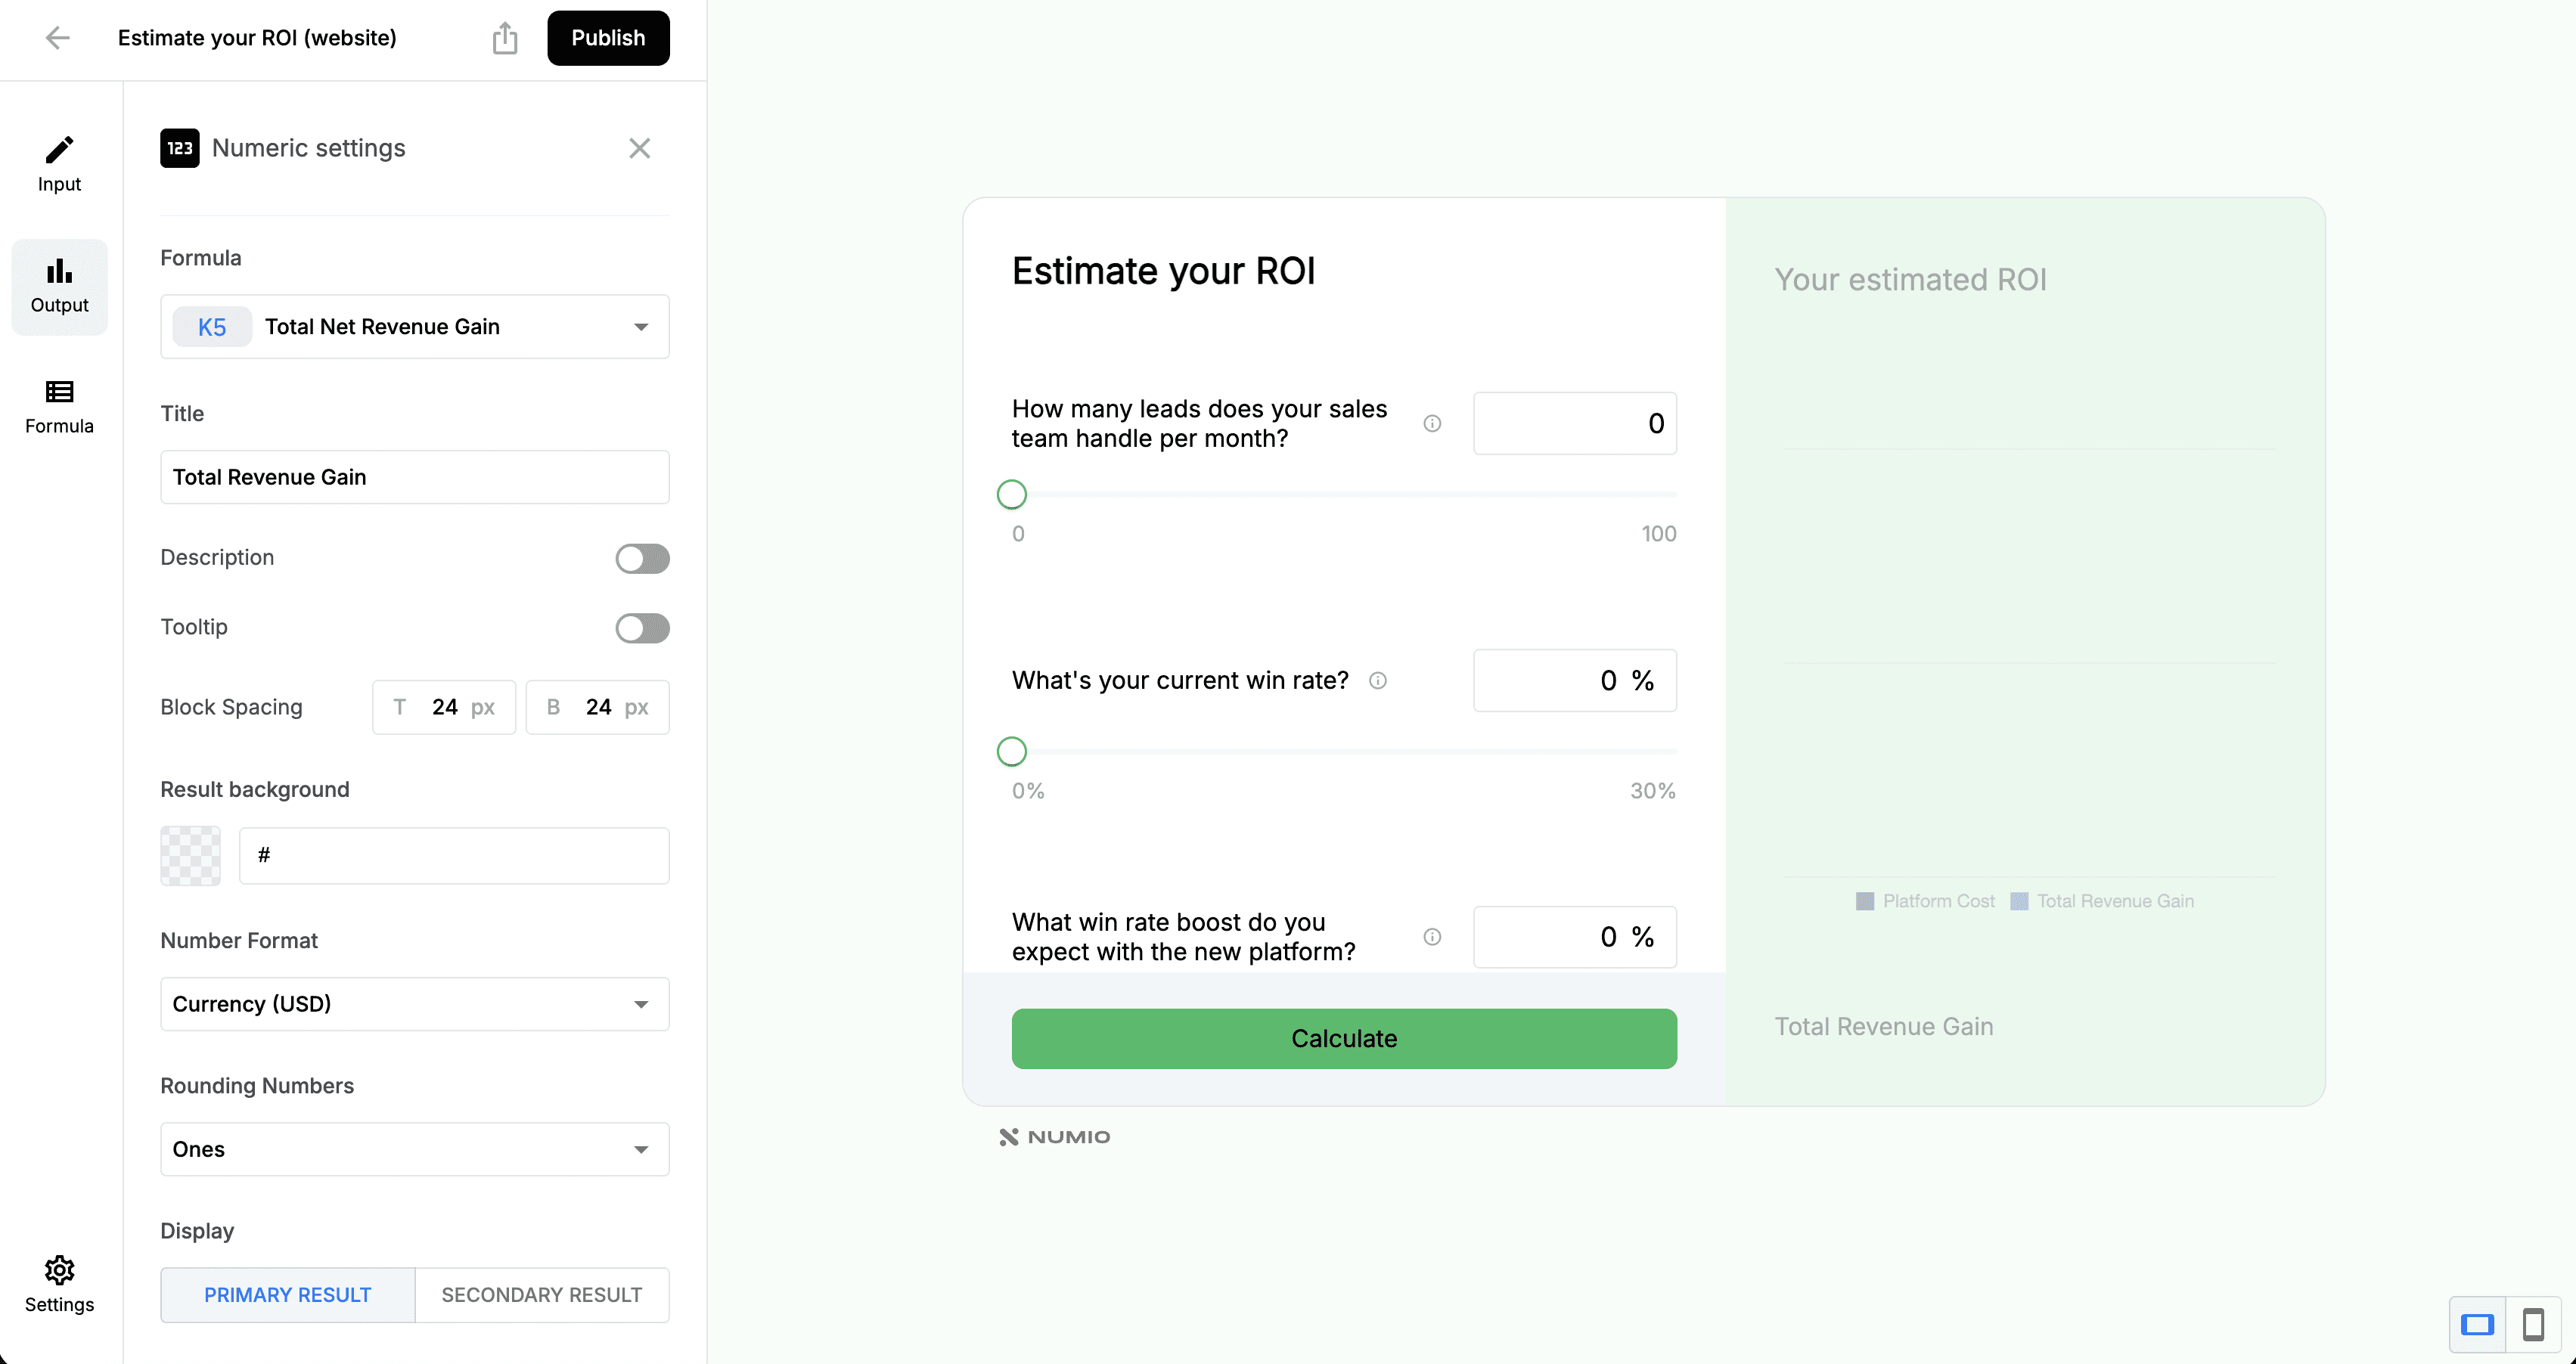
4. Add Output Fields
Outputs are the results your calculator displays after the user interacts with it.
Click the Output tab → Add Output to choose a result block.
Each output can be customized with:
Title
Description
Number format (currency, percentage, decimal, etc.)
Outputs will eventually connect to formulas you create.
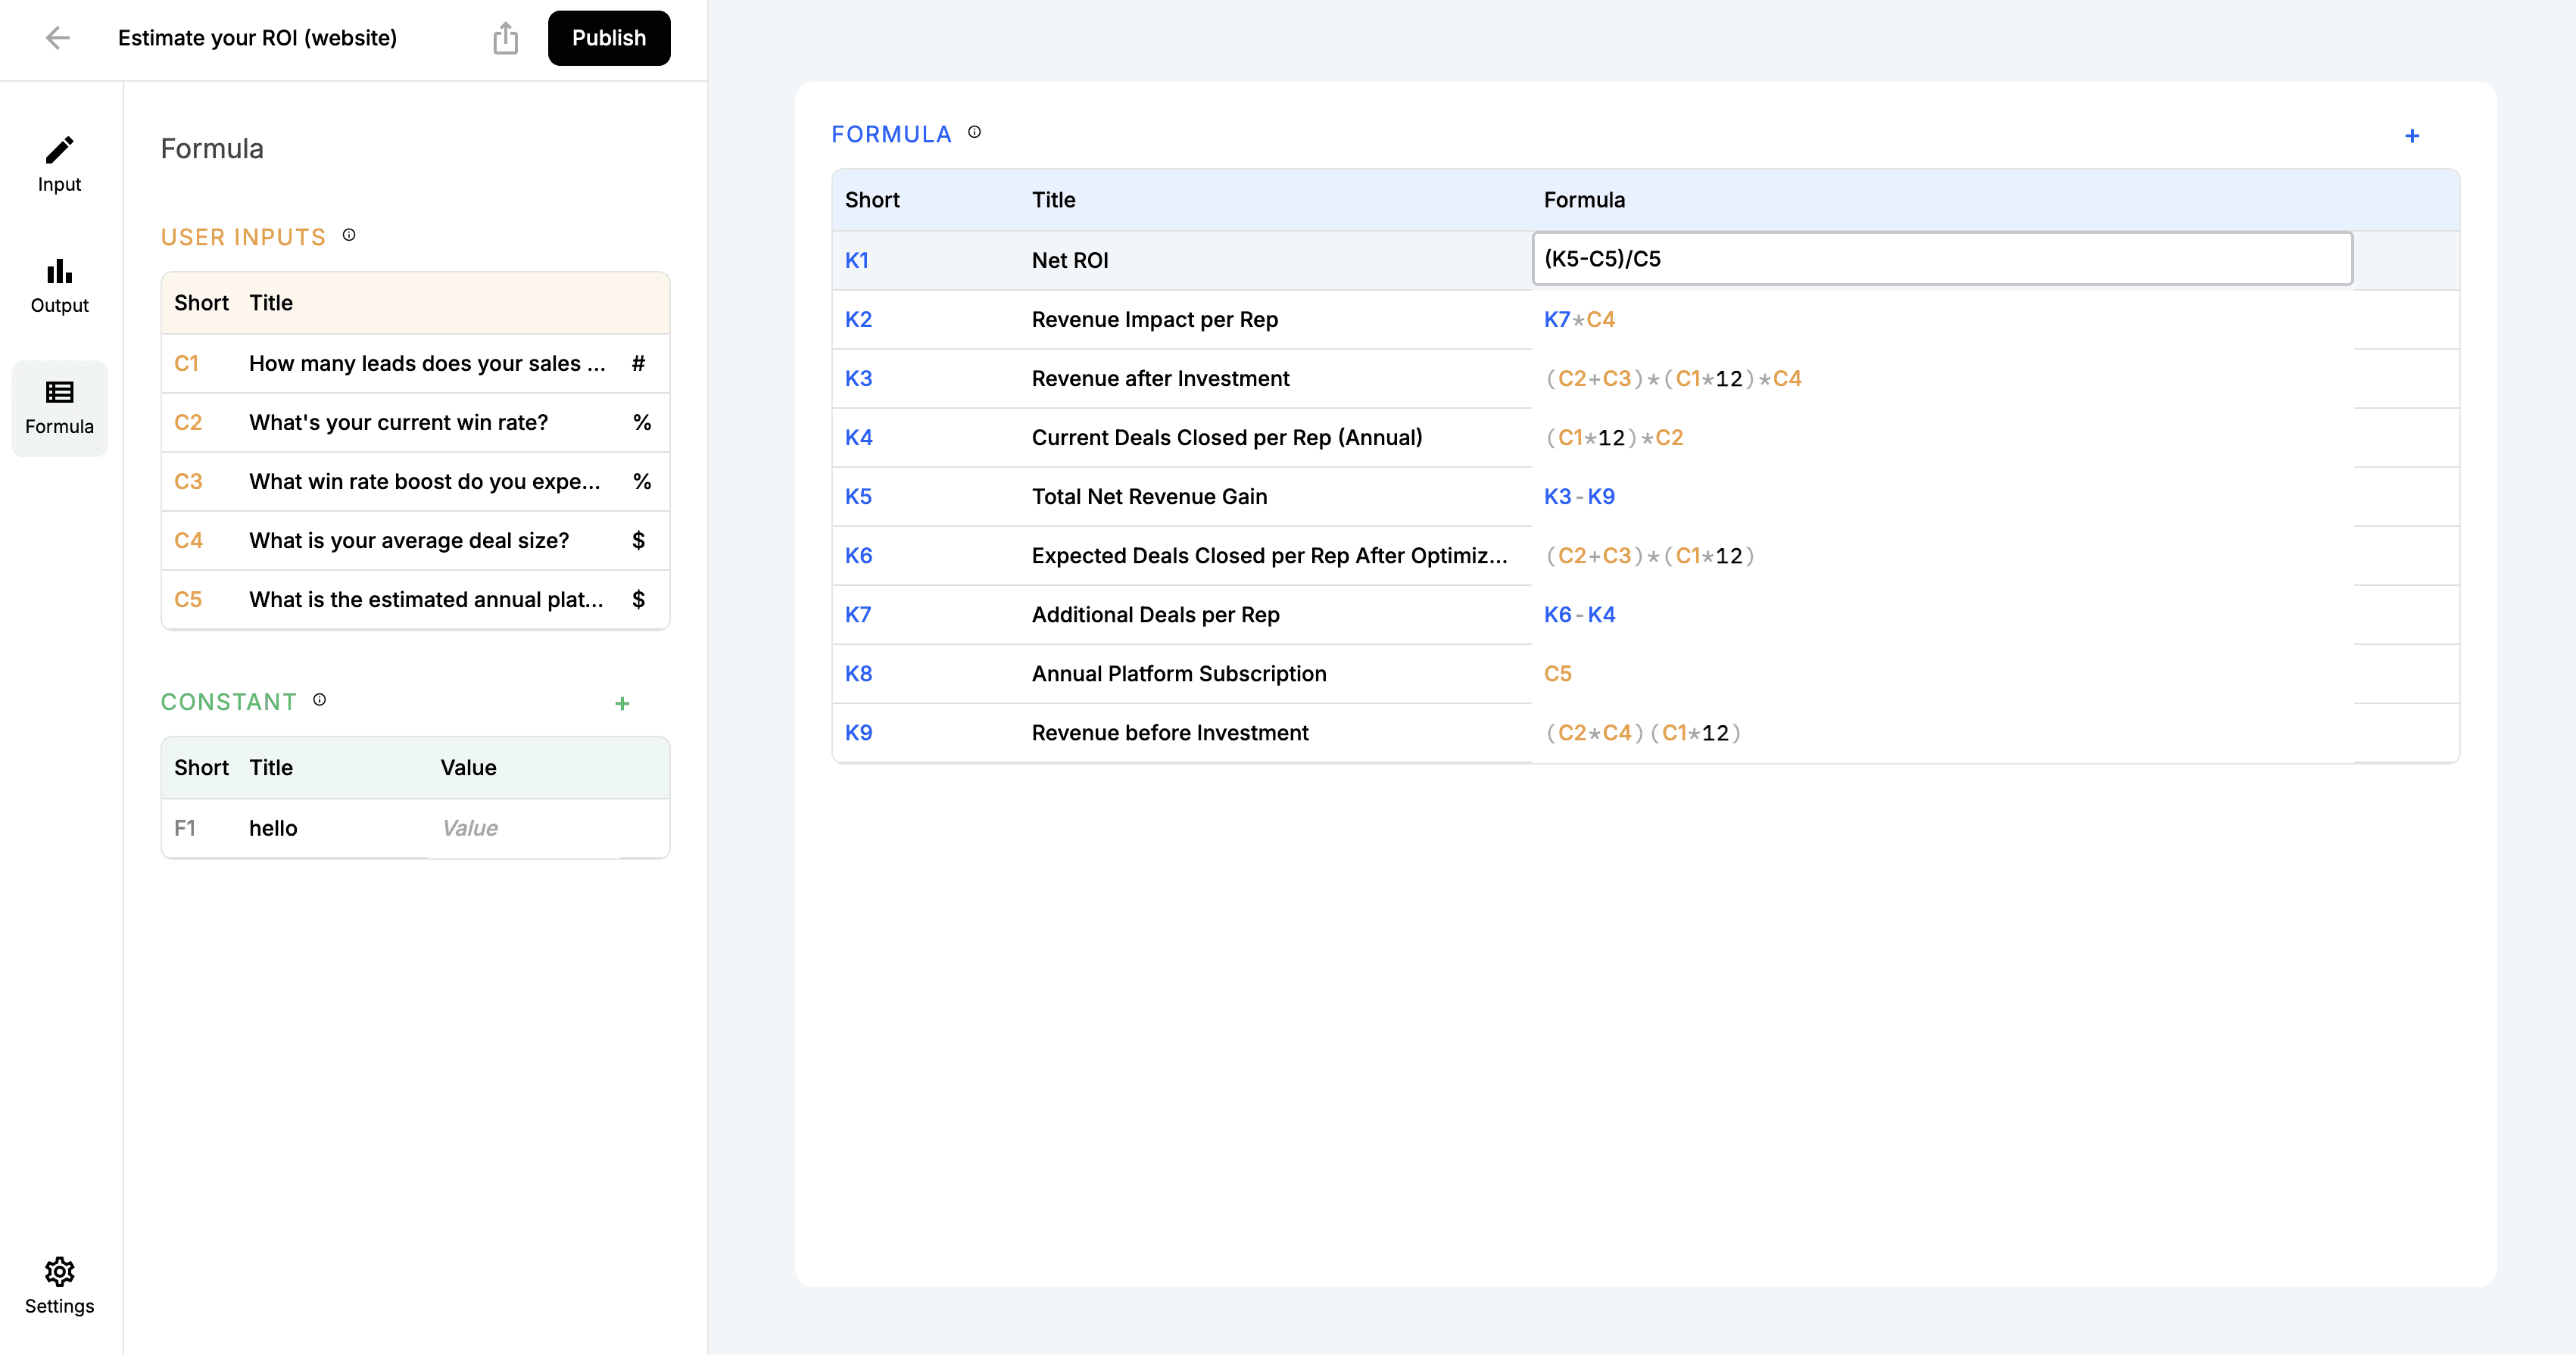
5. Create and Assign Formulas
Formulas allow your calculator to perform calculations based on user inputs.
Go to the Formula tab and create the formulas you need:
User Inputs — variables created from your input fields
Formula — calculations tied to outputs
Constant — fixed numbers that never change (optional)
After creating a formula, assign it to the appropriate output from the output settings panel.
6. Organize Your Layout
Use drag-and-drop to arrange the structure of your calculator.
You can separate your design into:
Input sections
Result areas
Headers or dividers
Optional description blocks
This helps create a clear, user-friendly flow.
7. Save and Publish Your Calculator
Click Publish in the top bar to save your final version.
To share your calculator:
Click the Share icon (next to Publish)
Copy the direct link, or
Copy the embed code to place it on your website
How do I create a calculator?
Written By: Jeremiah Simpson
Last Updated on Nov 19, 2025
Creating a calculator in Numio allows you to build interactive, customizable tools your users can engage with on your website. Whether you're creating a financial estimator, ROI tool, or cost-savings calculator, the setup process is simple. Follow the steps below to build your first calculator.
1. Access the Calculators Dashboard
From your Numio dashboard, click New Project.
Select Calculator, then give your project a name — for example, “Loan Estimate Calculator” or “ROI Estimator.”
2. Start Your Calculator
Click the Generate Project button.
This opens a blank calculator workspace where you can begin adding inputs, outputs, and formulas.
3. Add Your Input Fields
Inputs are the questions your users will answer. Each input becomes a variable you can reference in formulas.
Click + to open the input type menu. You can choose from:
Slider
Selection
Input (number/text)
Text
Dropdown
Toggle
Lead Form
Divider
Configure each input in the left-hand panel.
Here you can update labels, placeholders, ranges, default values, and more.
4. Add Output Fields
Outputs are the results your calculator displays after the user interacts with it.
Click the Output tab → Add Output to choose a result block.
Each output can be customized with:
Title
Description
Number format (currency, percentage, decimal, etc.)
Outputs will eventually connect to formulas you create.
5. Create and Assign Formulas
Formulas allow your calculator to perform calculations based on user inputs.
Go to the Formula tab and create the formulas you need:
User Inputs — variables created from your input fields
Formula — calculations tied to outputs
Constant — fixed numbers that never change (optional)
After creating a formula, assign it to the appropriate output from the output settings panel.
6. Organize Your Layout
Use drag-and-drop to arrange the structure of your calculator.
You can separate your design into:
Input sections
Result areas
Headers or dividers
Optional description blocks
This helps create a clear, user-friendly flow.
7. Save and Publish Your Calculator
Click Publish in the top bar to save your final version.
To share your calculator:
Click the Share icon (next to Publish)
Copy the direct link, or
Copy the embed code to place it on your website